Check out what’s new in Apty!
- Content Review and Approval
- Trigger Notification
- Disable Buttons for Validations
- New Jump Step conditions for Workflow Branching
- Autofill
- Auto Validation
Content Review and Approval
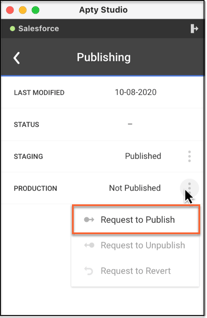
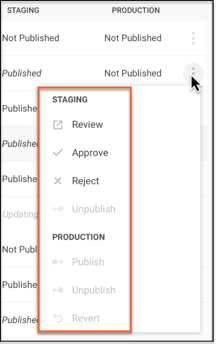
The new Content Review and Approval functionality allows you to require approval before content is published. This process is aimed to reduce content errors allowing content approvers to evaluate the quality and accuracy of the content before it’s seen by end users.
There are two stages of this approval process:
Stage 1: Create content and request approval.

Stage 2: Review content and approve publication.


Note:
Please reach out to your Customer Success Manager if you wish to enable this feature.
To learn more about Content Review and Approval, see Configure your Application Environments, Create Content and Request for Approval, and Review Content and Approve for Publish.
Trigger Notification
Imagine a situation when the end user is filling out information on your application and she becomes inactive for a short period of time. You can now enable a Trigger Notification for Tooltips and Launchers to nudge and assist her in completing the task within seconds. In a future release, we will add Trigger Notification to other Apty functionality but for now, it works with Tooltips and Launchers.
Tigger Notification will work only when:
-
The user performs an event that is associated with a Launcher or a Tooltip and then stays inactive for the specified number of seconds that you have configured in the AUTOPLAY section in Apty Studio.

Note:
-
The Trigger Notification will only work on HTML input fields and HTML select dropdowns (the elements which have focus event).
-
Since floating tooltips are only shown while a user is actively using your application and hovering the cursor over the selected element, the Trigger Notification will be disabled for floating tooltips.
-
Launchers that are shown as buttons do not display any message, hence the Trigger Notification will be disabled for this form of Launcher.
To learn how to configure the time duration for Trigger Notifications, see Create a Launcher and Create a Tooltip.
Disable buttons for Validations
The new Disable DOM elements feature allows you to prevent end users from clicking certain buttons until a Validation has been satisfied. You might want to prevent the end user from going to the next step until the phone number field has been correctly filled in with numbers or the email address field box has a proper email address with @ entered correctly.
 You can configure your Validations to use this functionality by clicking the Disable DOM elements option in Apty Studio and then selecting the elements you want to disable.
To learn more, see Disable DOM Elements.
New Jump Step Conditions for Workflow Branching
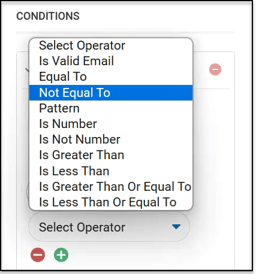
Workflow Branching has been enhanced to include a few new Jump Step conditions, some changes to existing Jump Steps, and a new rule engine to provide more possibilities. Additionally, you can apply multiple Jump Step conditions to your Workflows.
The new Jump Step conditions include:
-
Storage: Allows to branch a Workflow depending on storage variables in the host applications, such as the Window Variable, Local Storage, Sessions Storage, and Cookies.
-
Segment: Allows to branch a Workflow based on segments if those segments are related to a certain user.

The enhancements to existing Jump Step conditions include:
-
Element Selection: A new rule engine has been added for more element selection options.

Autofill
Autofill enables you to auto-populate fields without requiring your end users to interact with the events on your application. To ease the user's task, you can configure your Workflows with the Autofill functionality to auto-click an element from a dropdown menu or auto-populate a cell with predefined values that follow a pattern or are based on values in other cells.
Note:
-
Autofill works with default HTML input fields and HTML select dropdowns.
-
Autofill supports Salesforce and Workday dropdown menus.
Some benefits of Autofill include:
-
Auto-populate crucial values to reduce end-user errors.
-
Show relevant information about any event without requiring end-user interaction with the event
-
Save time and lead users to complete the tasks more quickly.
To learn how to use Autofill, see Enable Autofill in a Workflow step.
Auto Validation
Auto Validation helps to verify the data for a particular field while you are typing the data in that input field. For example, if an input field already contains values then it will auto validate and not wait for the user to change the values. The validation of an input field is defined as either valid or invalid depending on the type of validator you use. A validation indicator "x" indicates that the data you've provided is invalid. Similarly, when you enter valid data, a green checkmark appears.
|
Indicator |
Meaning |
|---|---|
 |
Valid |

|
Invalid |
